Creating Multiple Inventory Locations and Moving Items Across Inventory Locations
Creating Multiple Inventory Locations and Moving Items Across Locations
MYOB Premier provides for default inventory location which is the main inventory location. However, if your inventories are stored and kept in more than one location and you want to keep track of the inventory movements, MYOB Premier enable you to create and setup multiple inventory locations. Consequently, MYOB provides for Location field when you enter transactions in Sales and Purchases when you enter additional Location other than the default and main inventory location. You can also record inventory movements among the inventory locations you have set up by using Move Items feature of Inventory Main Command Centre.
To create Inventory Location, follow these procedures:
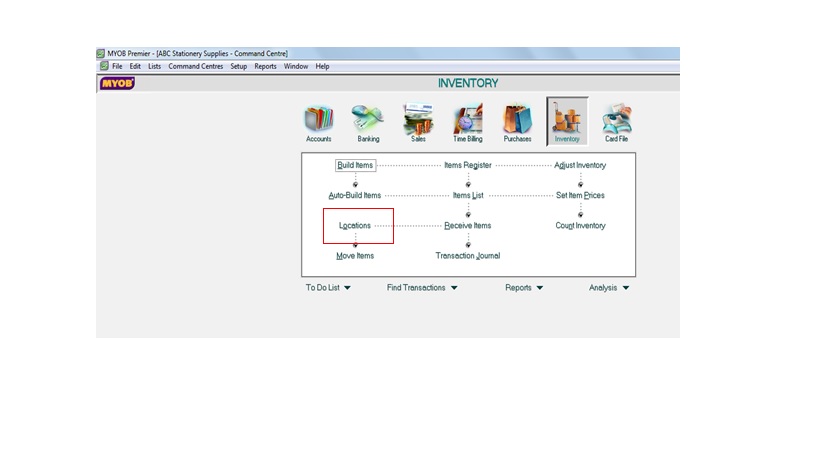
1) Go to Inventory Main Command Centre and click on Locations.
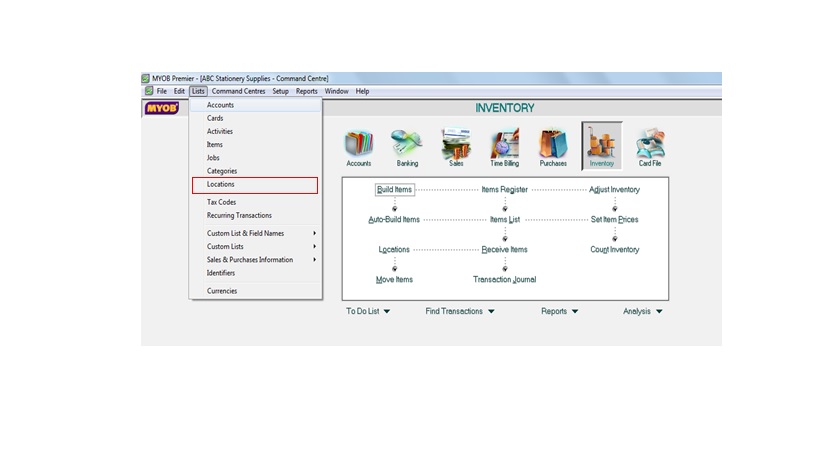
You can also go to the command centre at the top and go directly to Lists and choose Locations as per screenshot below:
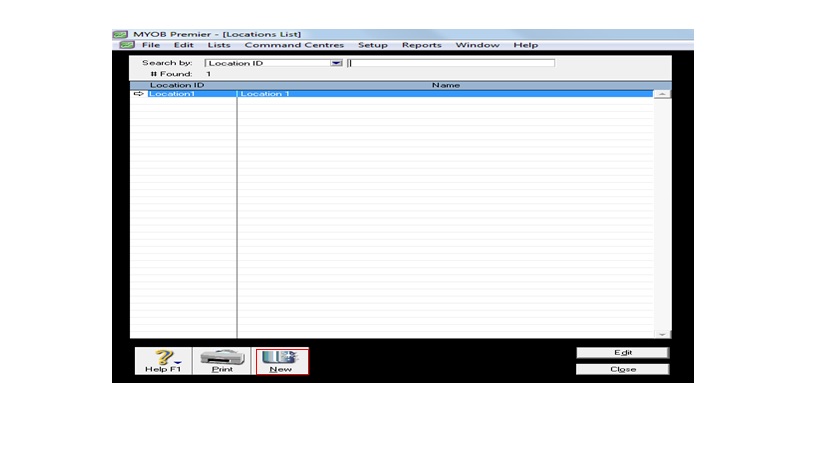
 The Location List window appears. Now, click on New to create additional inventory location:
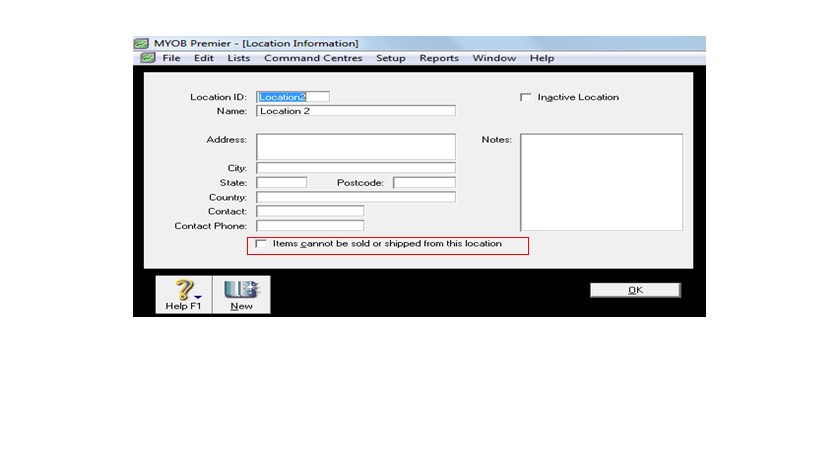
On the Location Information fill in the following fields:
- Location ID
- Location Name
- Address
- Contact Name and Contact Numbers
- Items Cannot be Sold or Shipped from This Location – if the additional Location is for inventory storage purposes only, you can only receive or sell items from this location by using Move Items feature which will be further discussed in this part.
Below the screenshot of sample Location 2 created as additional Inventory Location. After indicating the necessary information on the fields, click OK to save and click Close to go close the window.
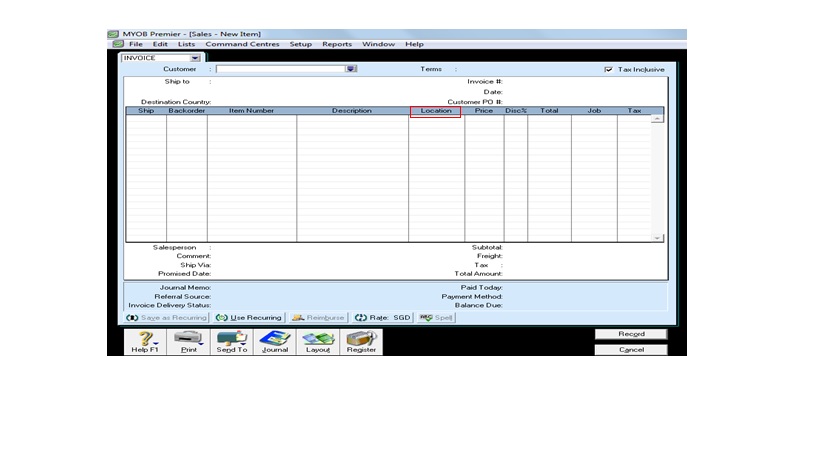
For reference purposes, see screenshot below for the Sales Invoice format after creating additional Inventory Location showing additional field for Location on the invoice display.
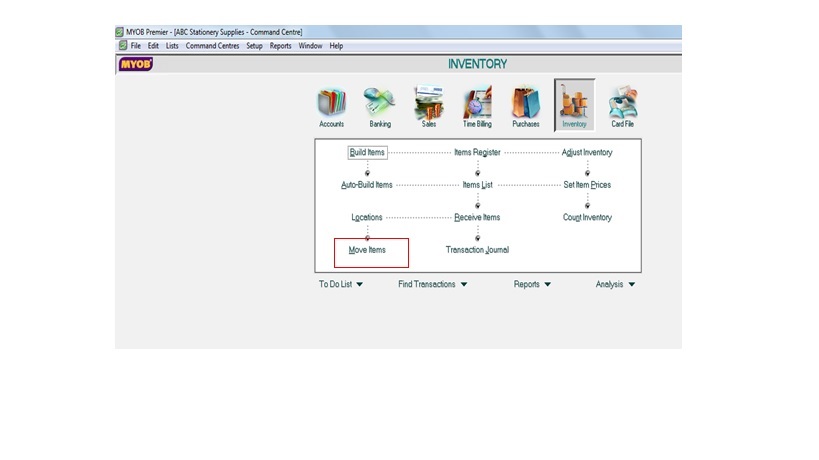
How to Record Inventory Movements Between Multiple Locations
Transfers of inventory from one inventory location to another recorded in MYOB by using Move Items feature.
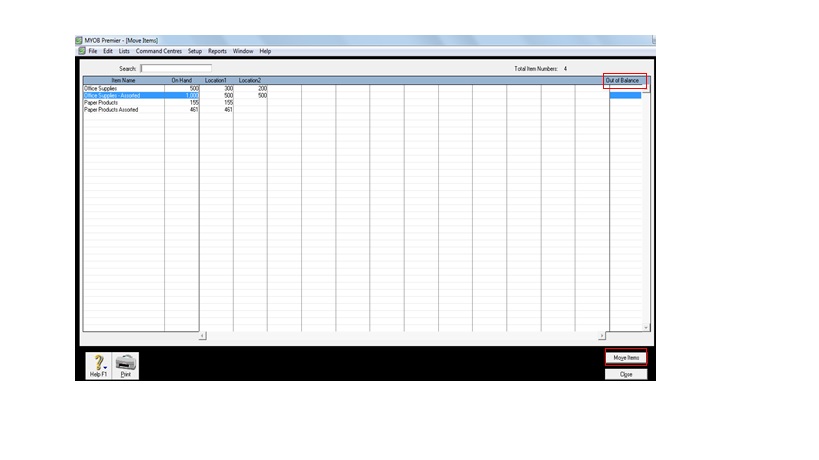
The following screen appears showing all the Item Lists and Locations as follows:
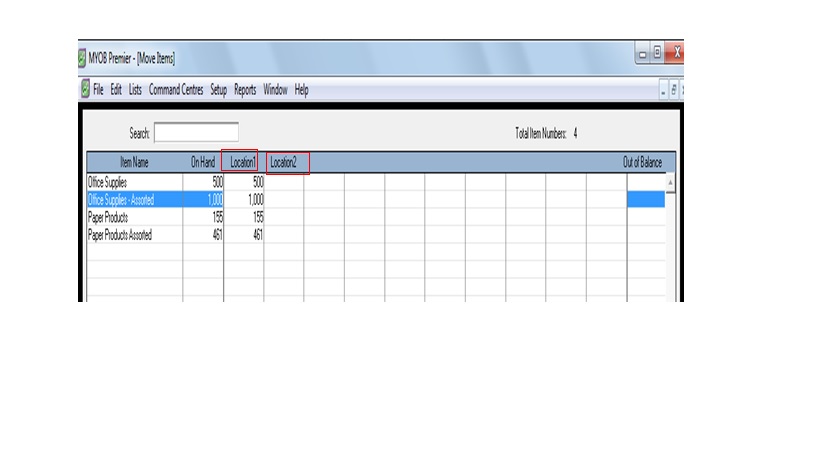
For illustration purposes, let’s assume that the following items are to be moved from Location 1 to Location 2 due to inventory location storage space limitation:
Item OS0001 – 200 units will be moved from Location 1 to Location 2
Item OS0002 – 500 units will be moved from Location 1 to Location 2
To effect the movement of items from Location 1 to Location 2, do the following:
1) Indicate quantity of 200 for Item OS0001 – Office Supplies in Location 2 column per above screenshot
2) Indicate quantity of 500 for Item OS0002 – Office Supplies-Assorted in Location 2 column
3) You can either press Tab to move between the item fields and columns to change quantities between locations or simply click on the field
4) Deduct the quantity of 200 from Item OS001 – Office Supplies in Location 1 column
5) Deduct the quantity of 500 from Item OS0002 – Office Supplies Assorted in Location 1 column
6) The Out of Balance column should be zero before you can click to Move Items as per screenshot below.
7) Click on Move Items to effect the inventory movement
8) Click Close to go back to the main command centre.
See Screenshot below to effect the inventory movement from Location 1 to Location 2.
