Excel Workbook Protection Using Simple Steps
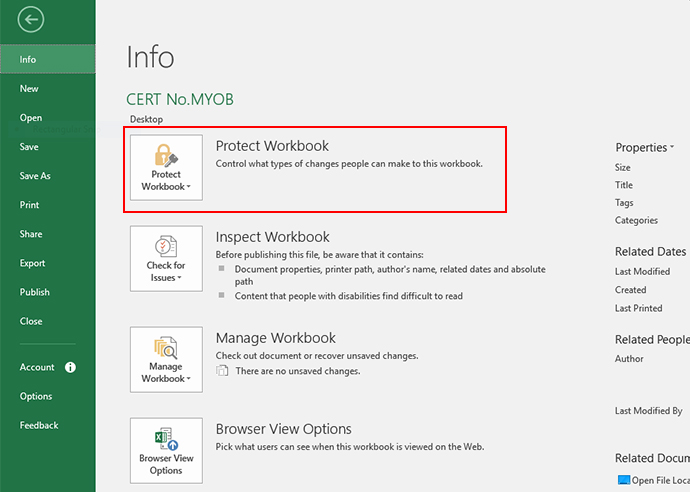
If your line of work requires you to keep track of sensitive data, then you may want to consider applying workbook protection to the relevant excel files you wish to protect. Excel versions like Excel 2010 comes with a built in command ‘Protect workbook’ that enables you to prevent your workbook layout to be changed.
However, do note that this alone is not enough, since this does not protect the contents of your file. What you can do for the contents section, is to make use of the ‘Protect sheet’ function that can be found under the Reviews tab so that your contents will not be able to be changed as well. After doing so, you can even come up with a password so that others are unable to access without one.

Here’s how you protect your excel workbook:
1. ‘Project Workbook’
Locate the protect workbook function by looking for changes, and then seeking out Review. Once you have the option selected, Excel will open up a project structure and window box. Select the structure option and you should be all set! If you want to go a step beyond, you can also select protect windows as well. But remember to size and position everything first before you have the option selected since it retains this format for you.
2. Password
Once the dialog box is out, take a look at the interface closely. To set up a password for your workbook, you can check the text box that is provided and type in your desired password before selecting ok. Excel will then ask you to confirm the password, just re-enter it again and hit proceed.
3. Protecting (Editable amongst shared)
The above steps were catered for individuals- but if you are protecting a workbook that is shared and updated by other users, you can make use of the ‘Protect and Share workbook’ function instead so that Excel knows and will track the changes that are made. This way, everyone will have the latest updated workbook access.
4. Protecting (Uneditable amongst shared)
Unlike the above, you can protect a shared workbook but this time, no one else can disable Excel from tracking changes. You can assign a password for users who want to make changes instead and they must be able to supply that password before being able to change the details.
And there you have it, simple, straightforward and efficient. By doing this, you can make sure to keep confidential data private and ensure that no one but yourself is able to change details or tweak the data protection services as you please!