How to Build Inventory Items in MYOB Premier
How to Build Inventory Items in MYOB Premier
MYOB Premier allows you to build inventory items, in case you are buying items and further processing two or more items (components) to make another item, which now become a finished item or finished item.
Before you can start building your items, you have to make sure you already know which components you need to build an item and that these items are setup already in MYOB. Otherwise, if you have not yet setup the component items, you have to setup these items as taken up in the topic How to Create Inventory Items in MYOB Premier.
You have two options to build inventory items in MYOB Premier as follows:
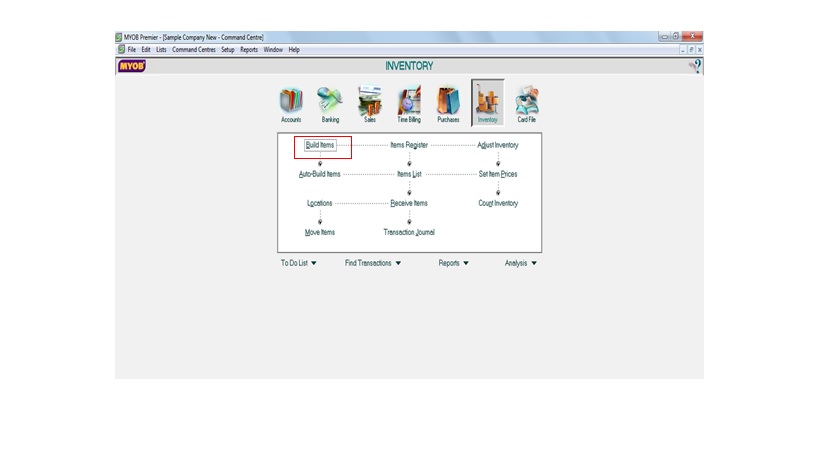
1) Use Build Items – if you want to build an item once. To get started with building items in MYOB Premier, click on the Inventory command Centre.
2) Use Auto-build Items – if you build items more than once, it is best to use this option.
How to build items using Build Items
- Go to the Inventory command centre and click Build Items. Screenshot of the Build Inventory window below:
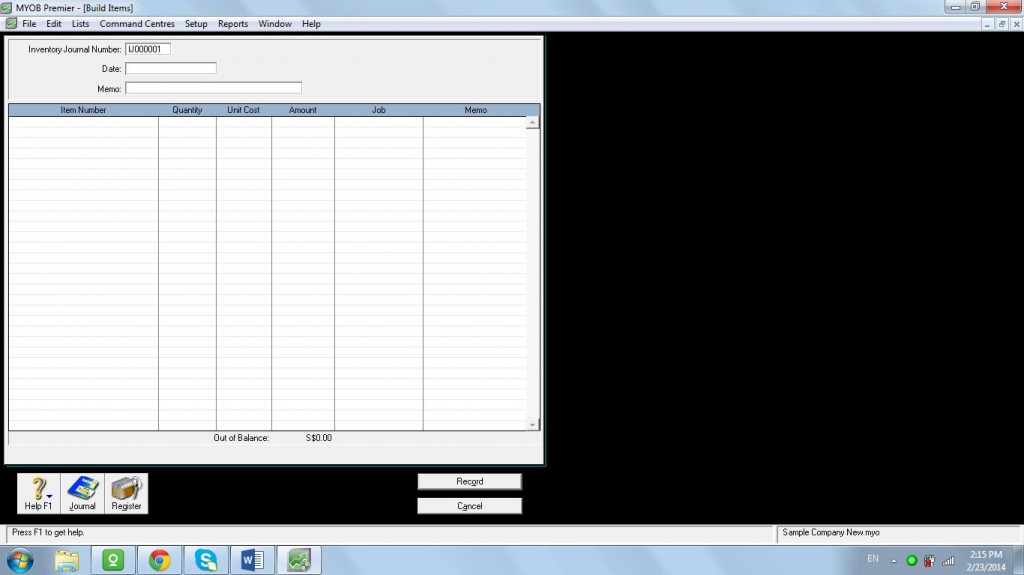
2. Note that the Inventory Journal Number and Date are already default values. However, you can change the default values of these fields as well as the Memo field as you consider necessary. Fill in the necessary fields as follows:
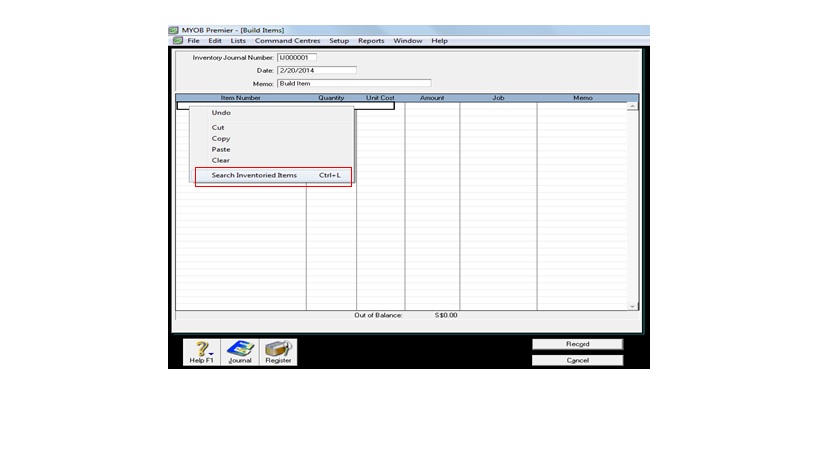
2.1. Fill in the Item Numbers field. If you don’t know the item number, you can do search for the item number by doing Right Click on the blank field for Item Numbers. Screenshot for the window appears below:
2.2. Quantity – quantity for this should be positive if you enter the quantity of the item or items to be built or the finished item. If you are entering quantity or quantities for the items or components for the finished item, you enter a negative quantity amount.
2.3. Unit Cost – indicate the unit cost of the item or items that would be used to build the item.
2.4. Amount – amount for the item would automatically appear once the quantity and unit cost is indicated on the fields.
2.5. Job – if you charge the finish item to a job, indicate the job in this field.
How to Build Items Using Auto-Build Items
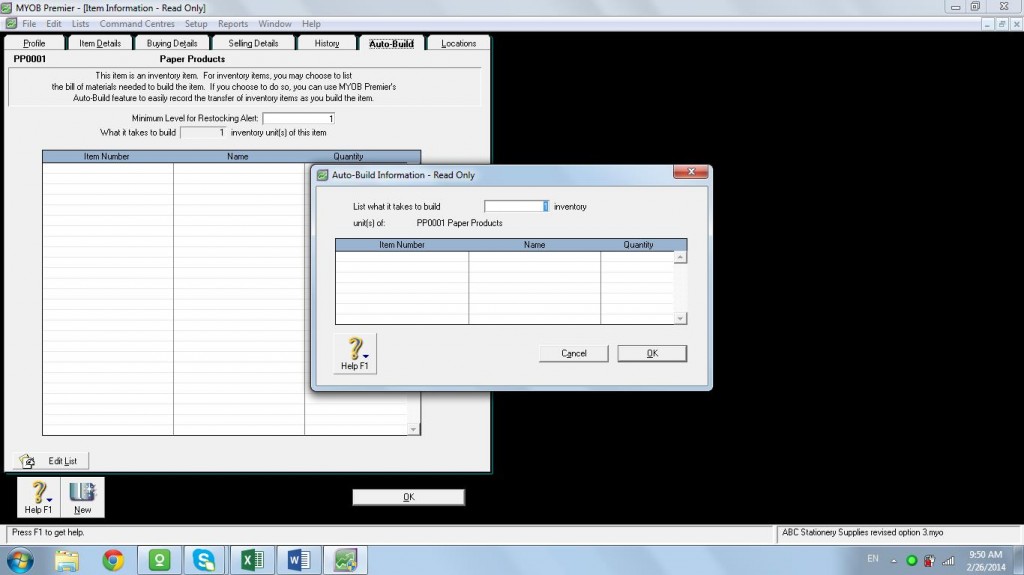
Take note that before you can Auto-Build Items, you have to identify and define the component items to build the finished item. The following are the steps to follow in order to Auto-Build Items:
- Go to Items List in the Inventory command centre and you start to define the item you want to build by clicking on the ( ) Zoom arrow per screenshot below:
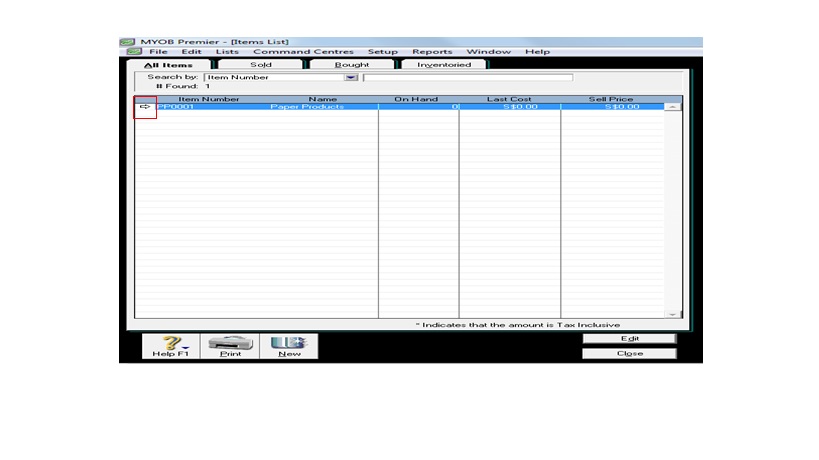 The Items List tab windows and choose Auto-Build tab per screenshot below:
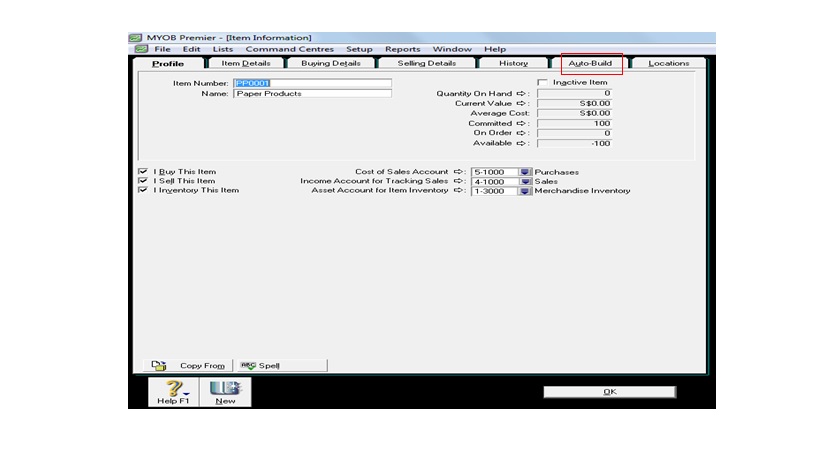
In the Auto-Build tab, indicate the Item Number of the item components as well as the quantity and press OK when done.
After defining the component items in the Items List, you can now proceed to Auto-Build items. To do this, go to the Auto-Build feature in the Inventory Command Centre and indicate the items, quantity as well as the components for you to build the items. Be sure you review your entries before you click on Record to effect the inventory items being built.