How to Create Inventory Adjustments in MYOB
How to Create Inventory Adjustment in MYOB Premier
Now that you have learned how to create items and locations, opening inventory quantities and values, our next topic would be to prepare adjustment in MYOB Premier.
As part of company’s internal controls, you need to properly monitor inventory movements, from inventory receipts to issuances, transfers to and from other locations and other movements as well as those transactions that require your attention as to shrinkages and loss. However, you may need to adjust inventory quantities from time to time as a result of shrinkage, damage, obsolescence, theft or material decrease in value of inventory cost that make it necessary to adjust its quantity or values.
Please follow these easy tips when making inventory adjustments:
- Print the Items List Summary Report – before you make inventory adjustments, print this report as a basis for the quantities summary and the inventory values. You also have the option to save this report in Excel format so that if you need to add column for Remarks, you can do so with ease without you having to manually prepare an Excel report for the Item List Summary or Inventory Report.
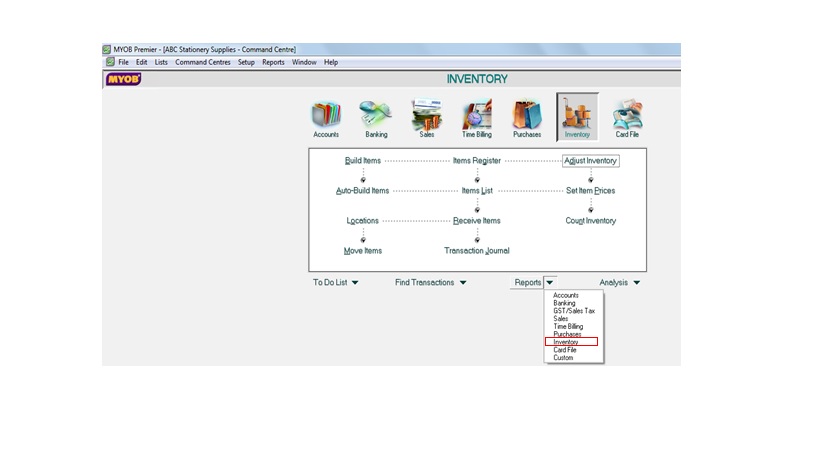
To print this report, go to Reports on the bottom corner of the main command centre and choose Inventory
The Inventory Reports window appear and choose Item List Summary
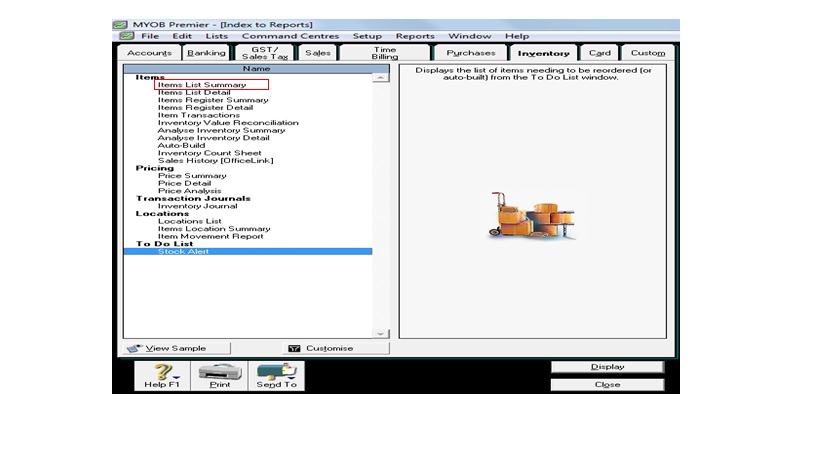
When you choose Items List Summary, and click on Display, the report look like this:
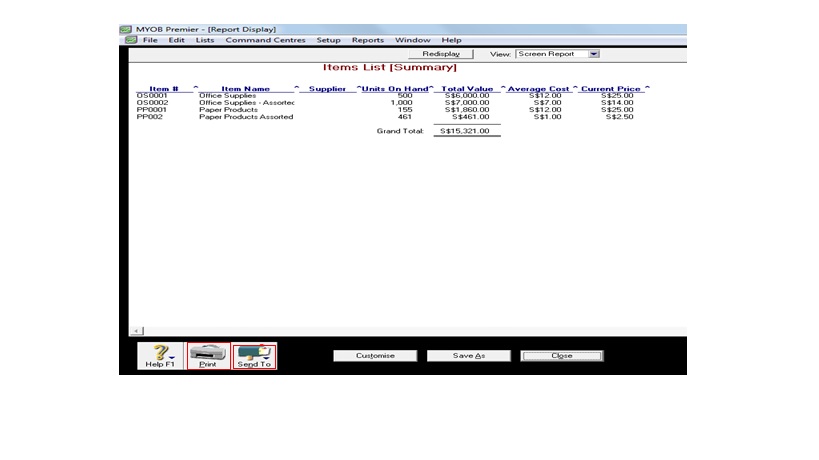
You also have the option to print this report directly to the printer or Send To Excel so you can print this report in Excel format or further modify report to include other information like Remarks or findings/action points.
- Use Adjust Inventory – when you make adjustment to one or few inventory items.
- Use Count Inventory – when you make adjustments to many inventory items.
To start making inventory adjustments using Adjust Inventory, follow these procedures after printing the Item List Summary:
- Go to Inventory Command Centre and click on Adjust Inventory
- In the Inventory Journal window, fill in the following details:
2.1. Date – the date the inventory adjustment is made
2.2. Memo – indicate brief but most descriptive explanation for the entry.
2.3. Item Name – you indicate the item name by right clicking on this field and choose Search Inventoried Items
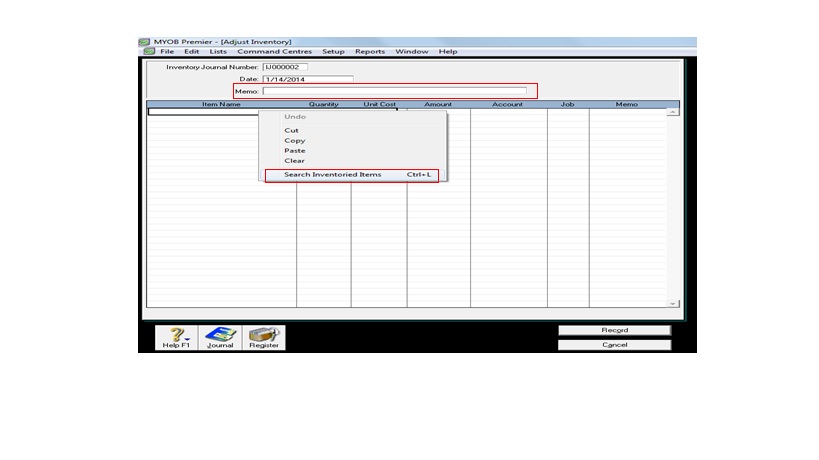
After click on Search Inventoried Items, all the item lists appear and you have to choose which among the list is or are to be made adjustment and double-click on it to select the item or items.
2.4. Quantity – indicate on this field the number of quantities for adjustment for each affected inventory items on a per unit basis and not per selling or buying unit. If you are to adjust inventory to add to quantity, enter the number as positive number (without positive sign). In case of deduction in inventory quantity of item, enter the amount with a negative sign before the number.
2.5. Unit Cost – indicate on this field the unit cost of the item inventory adjustment.
2.6. Amount – you don’t need to fill up on this field since MYOB Premier automatically compute for Amount values once you have entered the quantity as well as the unit cost.
2.7. Account – indicate the account for which the inventory adjustment is to be closed or charged. If for example, the negative inventory adjustment which is a decrease in inventory quantity would be charged to an expense account – usually Inventory Shrinkage and Shortages if it is to be charged as a company expense. However if it is to be charged to the inventory custodian, it is to be recorded as a receivable from employee or as advances to employee account.
2.8. Job – indicate the corresponding job if the inventory is tracked to a specific job.
If you are going to make inventory adjustment for several or many items in the inventories, you have to use Count Inventory in making inventory adjustment.
The process is the almost the same as entering inventory quantity and values opening balances except that it is for adjustment purpose and you don’t choose Opening Balances.
To start entering inventory adjustment, go to the Inventory Main Command Centre and click on Count Inventory.
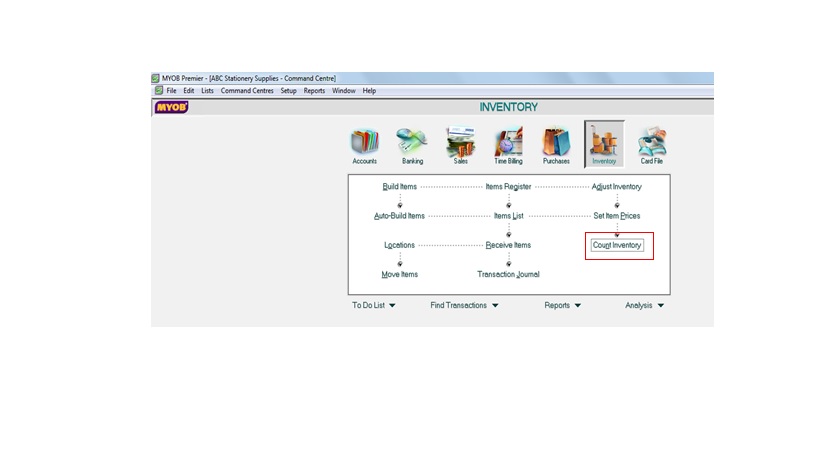
Please take note that Count Inventory would display all items in the list so it would be easy for you to make the adjusting entry. Screenshot below for Count Inventory appears:
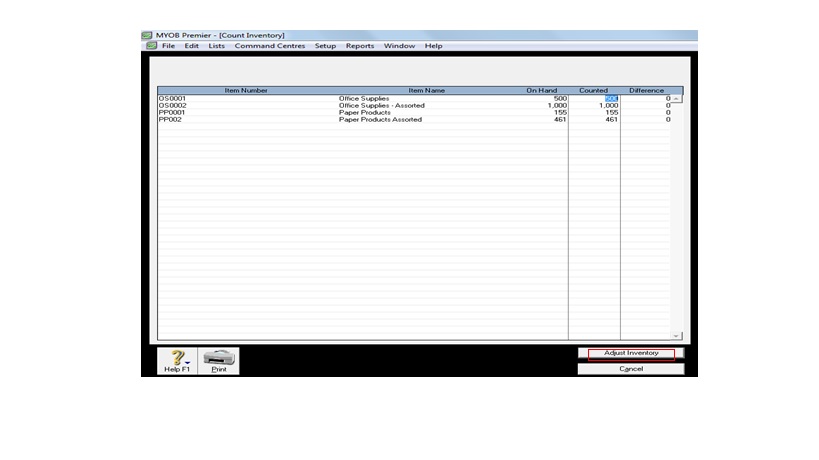
Next, indicate the quantities on the On Hand column so that the Difference in quantity would be reflected and click Adjust Inventory and proceed to preparing the adjusting entry on the Inventory Journal window. For illustration purposes, let’s assume the following:
Inventory Shortage for Item No. OS0001 for 1 unit, Item No. PP0002 for 2 units and the management have decided that the inventory shortage shall be charged to company expense. To effect the adjustment, see the screenshot below for the Count Inventory Journal. Fill in the necessary fields to complete the information and click Record to save the inventory journal.