Setting Up Multiple Currencies in MYOB Premier
Setting Up Multiple Currencies in MYOB Premier
MYOB Premier is capable of recording transactions in multiple currencies. However, in order for this feature to work properly, you have to complete tasks to enable your MYOB Premier software to work as expected. The following are the steps to complete to make your MYOB Premier ready to record transactions in multiple currencies:
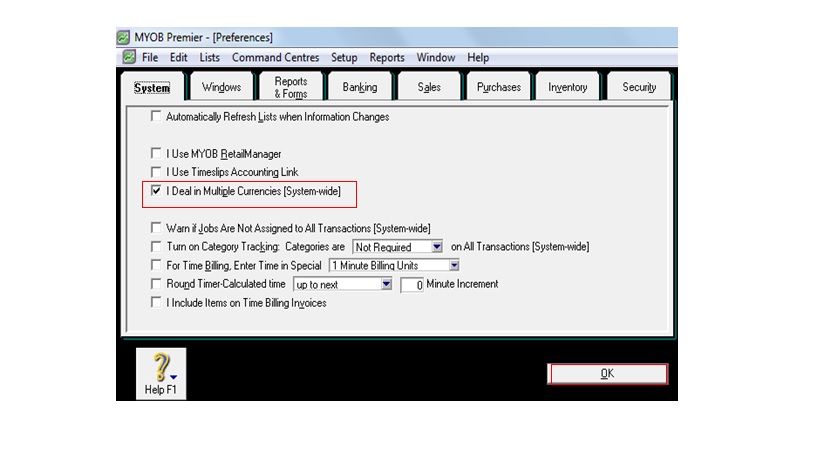
1. Select the “I Deal In Multiple Currencies” in System Option.
To do this, go to Setup then click Preferences. In the System tab, click on “I Deal in Multiple Currencies” and click OK. See screenshot below:
2. Create and set up records for foreign currencies
To do this, you have to setup the currencies and enter the current exchange rate. To get started, go to the Lists menu which is located in the upper portion of the seven main Command centre.
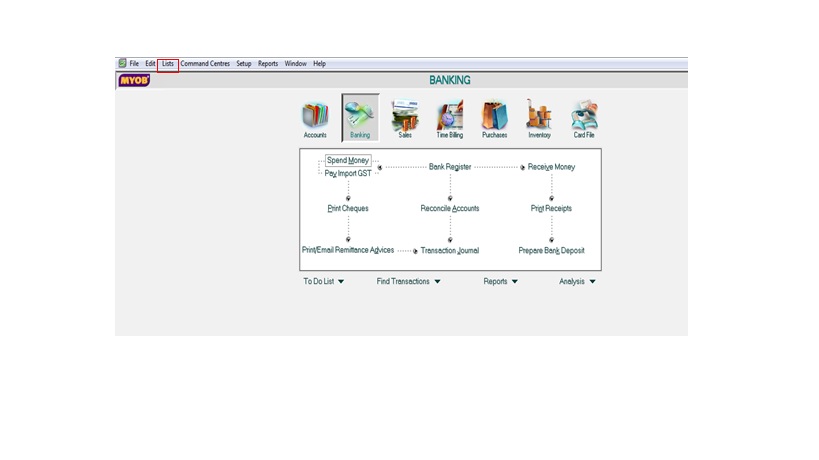
Click on Currencies
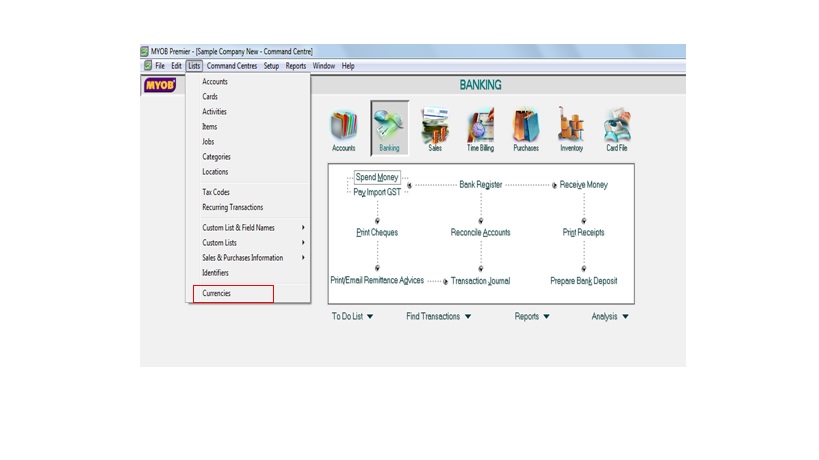 Screenshot of the screen that follows appear below:
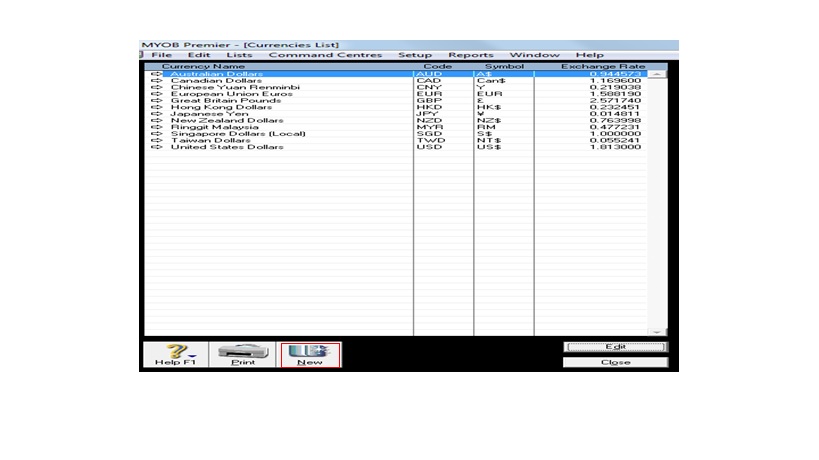
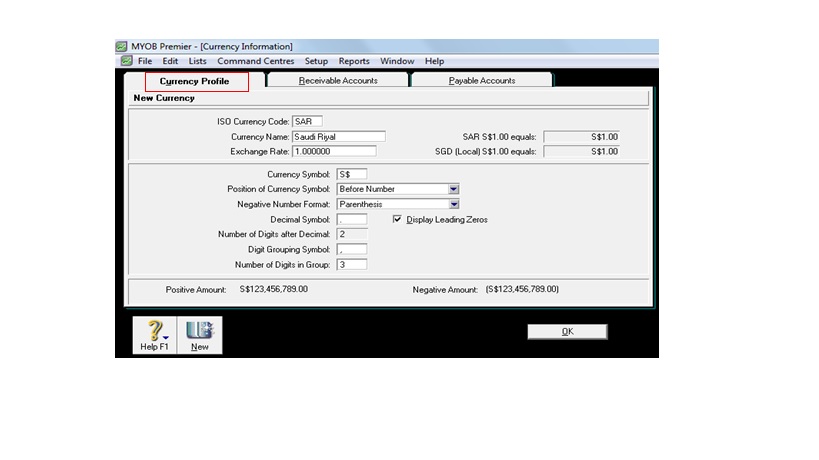
If you want to setup another currency not included in the setup, click on New. On the Currency Profile, the following screen appears. Fill in the necessary information below to complete the Currency Profile.
3. Create and setup accounts to link and track foreign currency transactions to accounts for purchases and sales. If you are making payments for your purchases to your suppliers in foreign currencies or selling items and accept foreign currency payments from your customers, you need to specify details on the following tab as applicable:
3.1. Receivable Accounts tab – If you are using the foreign currency for sales, you have to setup and create link in this tab. Be sure to indicate the correct information on the fields. Screenshot of the tab details appear below:
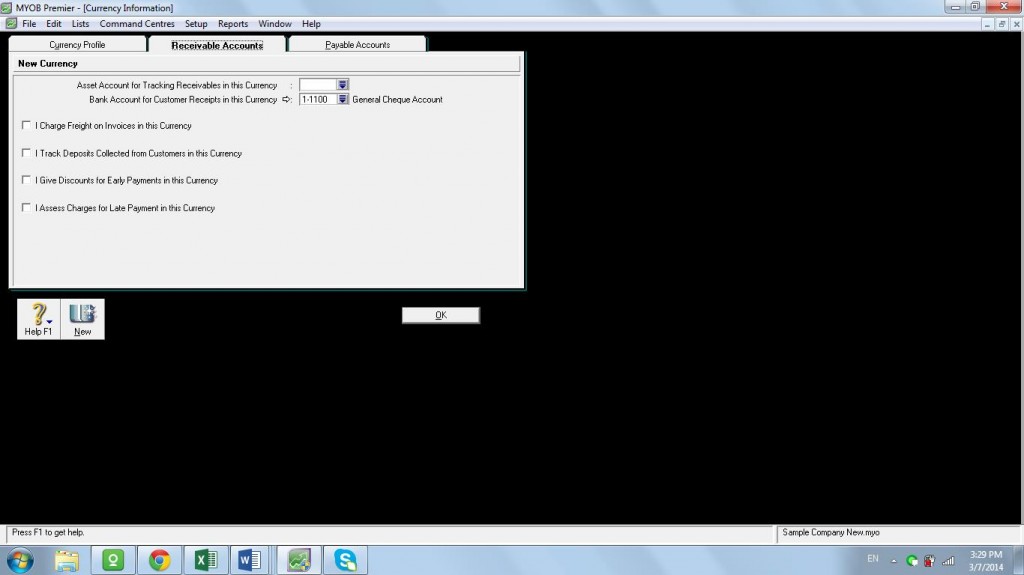
a. Asset account for Tracking Receivables in this Currency – be sure to link this account to a foreign currency receivable account.
b. Bank Account for Customer Receipts in this Currency – be sure to link this account to the bank account for which the receipts of payment will be deposited. This bank account could either be in local currency or in foreign currency.
c. Other fields that could be linked to setup by clicking on the tick box for check mark as follows:
- I Charge Freight on Invoices in this Currency
- I track Deposits Collected from Customers in this Currency
- I Give Discounts for Early Payments in this Currency
- I Assess Charges for Late Payment in this Currency
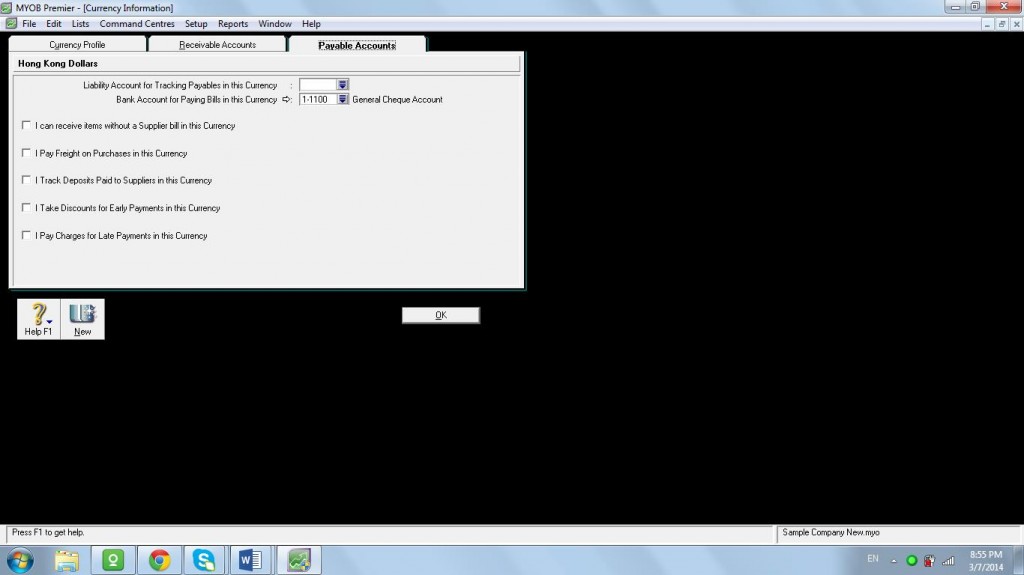
3.2.Payable Accounts tab – you use this tab to indicate fields and setup links for supplier purchases to be paid in foreign currencies and for customer advance payments or payment deposits for sales transactions. In this tab, you fill in the applicable fields as follows:
a. Liability Account for Tracking Payables in this Currency
b. Bank Account for Paying Bills in this Currency
c. Other fields that could be linked to setup by clicking on the tick box for check mark as follows:
- I can receive items without a Supplier Bill in this Currency
- I Pay Freight on Purchases in this Currency
- I Track Deposits Paid to Suppliers in this Currency
- I Take Discounts for Early Payment in this Currency
- I Pay Charges for Late Payments in this Currency
4. Assigning or linking foreign currencies to suppliers (for purchases transactions) and customers (for sales transactions).
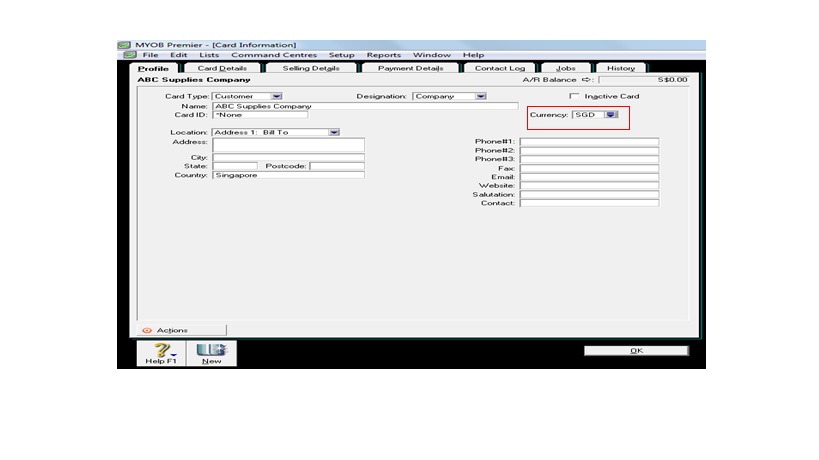
You have to assign foreign currency for the each Customer or Supplier Card. Take note you can only assign a single currency for each card. So, in case you assign more than one or multiple currencies for a Customer or Supplier card, you have to create another Card for each currency you are going to transact and accordingly assign. Also take note you cannot assign another currency to a Card with transactions already recorded.
To assign or link foreign currency to a Customer or Supplier card:
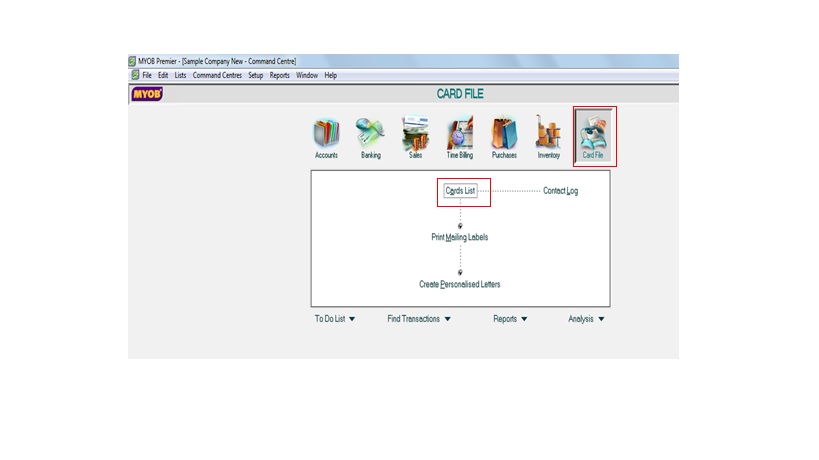
4.1. Go to the Card File main command centre and click on Cards List. Screen appears as per screenshot below:
The Card window appear as follows:
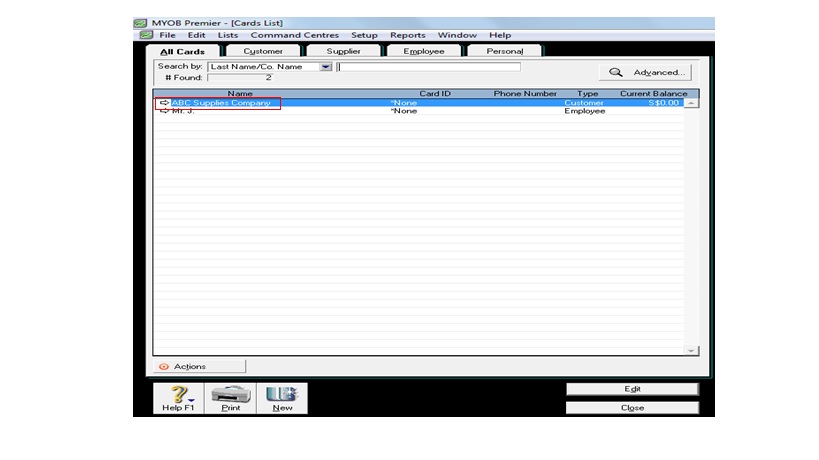 2. Click on the Zoom arrow to go to the Profile tab and fill up the necessary field. Be sure to indicate the currency to be used in the Currency field and click OK to close the window. For every card that you are going to setup currency, follow this transaction. Screenshot for the screen below:
